Lostpedia
Advertisement
This information was revealed through the semi-canonical Lost video game
Lost: Via Domus
LostViaDomusCover
View Talk Edit
WalkthroughXbox 360 achievementsLocationsEaster eggsCredits
Characters:   Beady Eyes · Elliott Maslow · Lisa Gellhorn · Zoran Savo · Rico
Episodes: "Force Majeure" · "A New Day" · "Via Domus" · "Forty-Two" · "Hotel Persephone" · "Whatever It Takes" · "Worth A Thousand Words"


Below are links to the synopses of the Lost: Via Domus episodes. Underneath that are the episode walkthroughs to assist in playing the game.

Header green
Synopses
Nuvola devices joystick   

The plot and characters of Via Domus are not considered canon.

Basic controls[]

The chart below is a list of controls for the various consoles that support the game.

Controller
Console
Basic Commands
XBox360controller
Xbox 360
{Start}---Pause The Game

{Select}---View Your Notebook
{L Analog}---Move Character, Move In Menu
{R Analog}---Move Camera
{L-in}---Crouch
{R-in}---View
{D-pad}---Inventory, Scroll Notebook, Move In Menus
{Y button}---Examine, Special Action, Toggle In Menus
{B button}---Cancel, Back, Exit Menus
{A button}---Action, Select In Menus
{X button}---Use Item, Reload, Camera, Advance In Menues
{LB button}---Center Camera, Focus Backward
{LT button}---Aiming, Zoom
{RB button}---1st Person View, Focus Forward
{RT button}---Run, Fire Weapon, Zoom

Playstation3controller
Playstation 3
{X}---Action, Activate beacon, Pick up item, Talk, Take Picture

{Square}---Reload, Light Source, Go, Exit Camera, Enter and Exit Camera Mode
{Circle}---Cancel, Go Back
{Triangle}---Call (In Obs. Mode), Call Log, Examine
{L1}---Camera Snap, Move Focus Backward (Camera)
(L2}---Aim (Gun), Zoom Out (Camera)
(L3)---Move, Move In Menus
{R1}---Observation Camera, Move Focus Forward (Camera)
{R2}---Run, Zoom In (Camera), Shoot (Gun)
{R3}---Move camera, Aim (Camera)
{D-Pad}---Inventory, Move In Menus
{Select}---Notebook<br

Computerkeyboard
PC/Mac
{W,A,S,D Keys}---Move, Slow Down, Accelerate

{Mouse}---Camera Angle
{C}---Observation Camera (Toggle)
{I}---Inventory
{L}---Notebook
{Left}---Contextual Action, Pick Up Item (In Obs. Mode)
{Click Mouse/Enter}
{Right Click/Backspace}---Cancel/Back
{E}---Reload/Use Light
{Space Bar/Right Click}---Examine/Call Dog
{Shift}---Run (hold)
{Ctrl}---Aim Gun (hold)

Walkthrough[]

This section of the page will include a detailed, play by play walkthrough that can be used for all of the consoles that the game was released for. All versions of the game are the same, however the Xbox 360 game will also include achievements. A few of these will be included into the walkthrough, however if that is what you are looking for, you are advised to go to the achievements page. This walkthrough will not contain a lot of pictures from the game because it saves loading time. More pictures can be found on the individual episode pages. This role-playing game is a one player adventure played in the third person camera view. Via Domus has no multi-player capabilities. For your information, this walkthrough is written in both the first and third person point of view.

"Force Majeure"[]

Elliot's eye

The game opens with a classic shot of Elliott's eye.

Via Domus begins with Elliott opening his eyes to find himself laying on the ground somewhere in the jungle. He can't seem to remember anything before waking up, most likely from a bump to the noggin. After a short scene you will be able to stand up and walk around. To advance, look for a trail of plane wreckage that you need to follow. Walk (or run) down the path and you will come across Kate standing in front of an open field area. Talk to Kate, and she will tell you that you were involved in a plane crash. Continue to talk to her to get a bottle of water which will trigger the first of many flashbacks.

Once the flashback kicks in, you will see a picture broken up into several ripped up shots that come together as one photo. The trick is to get a picture of everything that is shown in the broken photo. Once the scene ends, you wind up on the plane in a chair with the ability to control a camera. The buttons are fairly easy to use and are listed on the screen (and they also tell you when you start). This will all begin when you see Cindy handing Kate some water in the front of the plane.

KateWater

Cindy gives Kate a bottle of water.

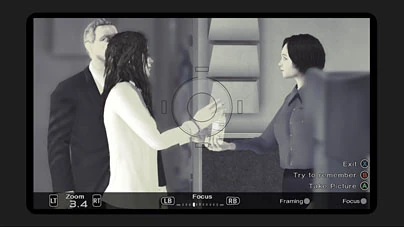
Just as Cindy hands Kate the water bottle you need to take a focused picture to complete your goal. The scene will kick back in with Kate asking if she can have some juice, Cindy replies that she will see if she can find her some later and walks over to Elliott's seat. You can now look around at three objects to get an achievement or talk to Cindy who will tell you that there is a convict on plane and this will end the flashback.

Flashback items that can be examined;
The first is a backpack down by your feet

"That’s my backpack. That thing’s followed me to so many crazy places."


The Second are photographs to your left on the seat divider

"Snapshots of me and a woman. The same woman I saw in the jungle. But I can’t remember who she is"


The third and last is a magazine slightly above the photographs

"SAVO WINS HUMANITAS AWARD – August 7, 2004
Zoran Savo, President of the Chenchey Institute of Research, has been awarded the international Union Humanities Award in recognition
of his considerable contributions to brain pattern research. Savo, currently on a speaking tour in Australia, announced he was
“shocked and delighted” by the recognition."


You then once again come back to the island standing in front of Kate. Elliott tells Kate he saw her in handcuffs and knows that she was a convict, which persuades her to help him in order to keep her secret. She tells you to follow Vincent, who will lead him to the crash site were there is a doctor that can check you out to see why you can't remember anything. Walk past Kate and follow Vincent through the jungle (you may need to run). If he gets to far ahead, call out for him and he will come back to you. Eventually you will arrive at the beach, which is the midst of chaos as seen in "Pilot, Part 1".

Your goal is to find Jack, who is on the right side of the plane next to the ocean giving CPR to an unknown passenger. He will instruct you to shut down a fuel leak before the plane explodes and tells you that you must to hurry (time is not a factor for this goal). Head over to the electrical panel at the front of the plane (closest to the jungle) and correctly distribute the current. Watch out for the plane engine on the way because if you step to close to it you will get sucked into making you the unlucky guy in the first episode of Lost (killing you). Once at the front of the plane you will have to go check out the fuse panel which is in the middle of the broken section of the fuselage. This is your first of many fuse puzzles that you will need to accomplish in this game. You have 3 different fuse types to work with including; 2-prong, 3-prong, and 4-prong. Each fuse type subtracts a different amount of power from the circuit, the key for this is in your upper left part of the screen. The idea is to complete the circuit and carry enough voltage to the end, while staying within the range (not going to high or to low).
FusePuzzle1

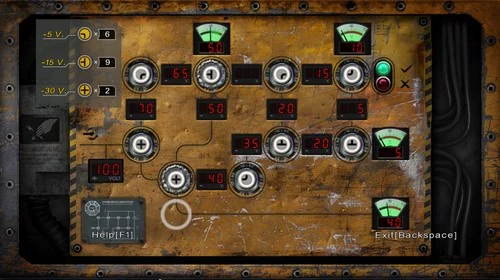
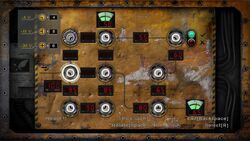
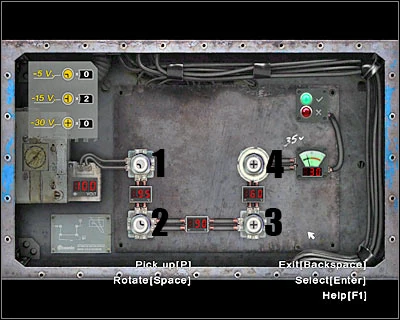
Plane Fuse Panel Puzzle.


Answer Key for plane fuse panel;

  • (Left to Right)
2-prong (Left and Down), 2-prong (Up and Right),
4-prong, 4 prong.


Once the fuel leak puzzle is solved, the wing of the plane falls, causing an explosion that knocks Elliott out and almost hits Jack, Hurley and Claire. Jack treats Elliott and tells him that he is most likely suffering from amnesia due to the crash and he suggests searching for items that belonged to him in the wreckage in order to jog his memory. While searching for the backpack, it is important to pick up anything else you can find to trade with other people. This is a handy tip that will always pay off in the end. Many things (like coconuts and water bottles) have cash value and can be found near tents and the tree line on the beach.

At the far end of the beach (to the right if looking at the ocean) is a backpack. When Elliott picks up the pack, an previously unseen man named Beady Eyes comes out of the jungle and starts to attack him. He promises you that he is going to get the photograph and then kill you, as if you knew exactly what he was talking about. The fight attracts the attention of Sayid who yells to everyone and informing them that someone is being attacked, followed by Jack yelling to "leave him alone" which makes Beady Eyes run away into the jungle. This ends the scene and the episode.

"A New Day"[]

Episode 2 starts with Jack, Kate and Charlie running out of the jungle in fear of something and falling to the ground frantically. Charlie yelps out "Monster" and the game begins again. Once able to walk, find and talk to Kate who suggests that your camera might be in the cockpit however Jack is not allowing anyone to leave the beach because of the monster. Go to the tree line to find Jack and talk to him for a quick second. This will get you nowhere but after you exit talking to him a girl named Lisa appears on the beach. Walk down the beach and talk to her, this will enter you into the next flashback.

The second flashback starts with Lisa in a bikini on a beach telling you to "hurry up and take the picture before she runs away with the fisherman" that is standing next to her. Take the picture as soon as she gets as far down beach as the Thai fisherman and starts to pose for the camera. This will trigger Elliott's memory a bit and he will remember he was taking photos in Thailand for the travel section of a newspaper. You then can look at the three objects needed for an achievement. After you are finished checking out the items talk to Lisa to end the walk around. Lisa (who speaks Thai apparently) tricks the fisherman so they can steal his boat to go to a local island not to far away. She tells the fisherman a story about a woman in trouble and he runs to help.


Flashbacks items that can be examined;

ThaiFisherman

The Thai Fisherman from the flashback.

The first is a newspaper

"NERVE AGENT STOLEN FROM HANSO LABS – 8 Aug 2004".Sri Lankan Police have confirmed the theft of a chemical nerve agent from Hanso Foundation Labs in Sabaragamuwa province.An unnamed Hanso Security Analyst has assured the missing chemicals pose no threat, “The danger is negligible as the chemicals in question will break down within hours outside the lab environment.”"

The second is Lisa's diary

"KOH TAO, THAILAND --- SUNDAY August 15th, 2004---I called Australia today. Savo’s made a critical error and Rico’s found out.Rico has a way of digging up the dirt. I’m meeting him at his disgusting little pawn shop. ---MONDAY---I was surprised with a beautiful beaded necklace this afternoon. Very romantic. He’s doing everything right on this vacation. Not like Venice!

The third is a tape of Lisa

"WOMAN’S VOICE states she’s close to finding a man named Savo. She’s following him to Australia and she’s keeping this news secret from her lover.


Once all of this ends and you wind up back on the beach remembering that Lisa tricked the fisherman. Go back to where you found Jack and talk to him again, this time there are different topics to discuss. Elliott tells Jack that Claire has fainted tricking him to leave his post at the jungle and run to her aid just as Lisa did in the flashback. Elliott than is able to walk into the first part of the jungle for the first time. When he gets there he starts to hear the whispers and also sees some plane wreckage like the junk that he followed in the start of the game. Walk a little further ahead and Locke with yell out to you that he is in the trees. Go talk to him and he will tell you that if you ever get into trouble head for the trees for protection and also to follow the plane wreckage to get where you need to. While in the woods always keep notice on how close the monster is by listening to the sounds it makes to judge how close it is. After following the path and picking up random fruits and other trade goods, one of the Others will shoot at Elliott from a high up tree, but once you run far enough in the correct direction the monster will swarm around the tree and kill the shooter. The monster ignores Elliott at this time unless you run right into it (which is fatal). Continue on to the next area where you are safe from all attacks of any kind. You will then see Michael gathering wood for a raft he is building next to a cave without Jack's permission. Michael tells Elliott that the cockpit can be reached through the cave ahead, keep talking to him and he will give you a lighter that is very necessary throughout the rest of the game. You can access this lighter in the equipment menu while in the game.
MichaelRaft

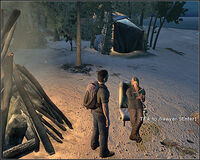
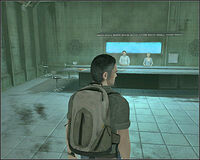
Michael gathers wood for the raft he is building.

Trade whatever you have to Michael for torches, make sure you get at least two or three to progress with ease. You can use the lighter, however, it gets hot and goes out fast. Also remember that torches go out when you walk under waterfalls or get caught in a bat trap in certain areas of caves. Follow the wall to the first light spot in the cave. If you get caught in the dark without light, the monster will eventually kill you (you can tell by the closeness of the sound and controller vibrations). Follow the wall again to the second light spot in the cave. There is a bat-filled tunnel on the right side, if you have a torch (or lantern), put it out before going through the short tunnel.

The monster is in the next section of caves and there are also pits on either side of the cave entrance that you can fall into and die. Look down as you enter to avoid them and make sure you use the torch in this next cave. Its possible to do it with the lighter, but not easy. There are waterfalls that will put out the torch so if it goes out, relight it as fast as possible or the monster will attack. The cave is really long and difficult to describe, it may take you a couple minutes to find your way. At the very end, there will be a tunnel full of bats leading to an exit. You will know you are close when you find a dead polar bear with a torch that you can pick up next to it - pass through the waterfall next to the polar bear, and head to the right.

Once out of the cave you will see a path that leads to the cockpit (which isn't tipped up as much as it was in the show, but anyway...), enter the plane threw the back and head to the front section. Right before the cockpit is a wall with two electrical panels, one that works and one that doesn't. Use the broken panel to collect as many fuses as possible and then go to the shut down panel next to it and get it going again.

ViaDomusFuses2

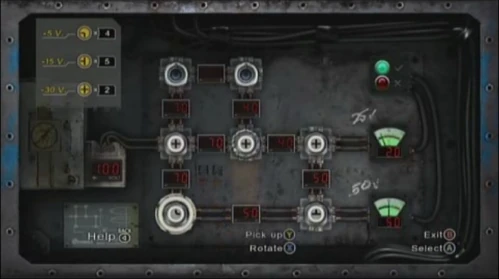
Cockpit Fuse Panel Puzzle.


Answer key for cockpit fuse panel;

  • Top row: empty, empty
  • Middle Row: 4-way, 4-way, 4-way
  • Lower Row: two-way (up and right), 3-way (no connection down)


After the panel is activated, the container holding your camera and laptop will be open in the middle left of the plane (if facing the way out of the cockpit). Go and collect your camera and laptop, then return to the front of the plane where the panels were. Take the fuses you just used to get the panel going so you have them for later (Good tip for you...you can always take the fuses you just used out of the panel to save them up and make your job easier in the long shot) and there is also a comic book you can use to trade inside the doors of the actual cockpit. Leave the plane the way you came in and you will encounter Ben and Juliet who are standing right in front of you. Tom will come up behind Elliott and knock him out and then Juliet will inject you with something making you pass out. This ends the scene and the episode.

"Via Domus"[]

ElliottHurleyVD

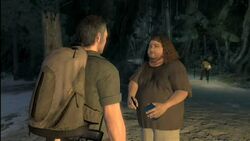
Hurley lets Elliott know the survivors are becoming suspicious.

You start this episode with Hurley finding you on the beach as you regain consciousness and he asks where you've been. You are disoriented, asking where the others are, and inform Hurley that you were attacked and stuck with a needle by some unknown people at the cockpit. He explains that the same thing happened to Claire, and that people are growing suspicious of you.

Begin by talking to Sayid who is in the middle of the beach working next to the tree line.  He will inform you that he can indeed fix your laptop to help you remember what you can (if you can find a battery), Sayid then suggests that you ask Locke for one.  Walk a little way in towards the ocean and speak to Locke who will tell you that you have no need for a battery because this island is giving you a fresh start, "brand spanking new." This will enter you into another flashback.

You begin in the back of a somewhat run down pawn shop in Australia. You need to get a picture of Lisa speaking to Rico with the "Rico's Shop" sign clearly in the picture. This will trigger Elliott to remember that he was watching Lisa argue with a source about information on Savo. After she leaves, Locke comes up in a wheelchair and spend some time arguing with Rico about camping equipment that Locke is trying to sell because he wasn't able to go on the walkabout. Locke wasn't able to sell the equipment because Rico stated he wouldn't be able to sell it to anyone else. You can now check the items.

Flashback items that can be examined;
The first is a note

"Photographer arrives at 4PM today"

The second is an article that details the nerve agent SARIN

"SARIN - A colorless, odorless, non-persistent liquid.Category: Nerve agentVolatility: Highly volatile. Death at 0.01 mg per kg of body weight or higher.Case study: RAF volunteer test subject died within minutes after twenty drops (200 mg) of sarin placed onto cloth draped over forearm."

The final one is a tape

"WOMAN'S VOICE: "Hello, Rico.  This is Ms. Gellhorn.It's imperative that I receive the package today.  If money is the issue, I'm willing to raise my offer.  I'll see you shortly."

SawyerBook

Sawyer reading again without his glasses.

To end the walk around go and talk to Rico who is leaning in the door and he mentions that you and Lisa used to be an item (romantically).  You ask him if you can get the dirt on Savo and he agrees to give you what you want.

Once you get back to the island you will find yourself standing in front of Locke just as you were before the flashback. If you continue to talk to him you will mention that you remember him being in a wheelchair. For some reason Locke doesn't want any one to know this and Elliott uses this to his advantage by blackmailing Locke for a battery. Locke agrees and asks you to follow him. He will run towards the jungle and after he stands there will be a backgammon game board that you can check out.

Follow Locke into the jungle and he will tell you to follow his markers on the trees and if you make it through he will meet you at the other end.  Just follow the markers and try to avoid being shot at by random Other's in their little tree forts.

You will stumble upon the Hatch, fully dug out just as it was before the losties blew it open.  Locke explains you found another one of his secrets and then you need to go talk to him.  Press him for the battery and he says to get it you will need to follow him and then he runs out of the hatch area. Locke also references the French poet René Char in this scene just in case you were wondering. If looking at the hatch from the direction that you walked in at, you can take a picture of the small numbers 4 8 15 16 23 42 on the hatch's side. Locke will already have run to the next area so follow him, but as soon as the screen loads turn right back around and head to the previous area with the hatch.  Now there will be a bright light beaming out of the hatch towards the sky, take a picture of this to get an achievement. Follow Locke over a bridge to get to the entrance of a another unknown cave.  He explains that the cave contains answers and that he will meet you on the other side with the battery. You must cross a river in order to get to the cave entrance but it sure is a great site to look around and check out a little bit.  If you need a light source you will now be able to trade with Locke just before entering the cave. He has 3 torches and 1 can of oil to use if you have an oil lantern at this point (Lantern's can remain lit under waterfalls unlike torches). Take at least 2 torches in with you, and remember if you are holding an old torch that was partially used, it will still only have the remaining amount of burn time on it so be prepared.

CaveCorpse

Elliott finds an Adam and Eve like corpse.

Enter the cave and you will see Lisa directly in front of you facing the other direction.  By the time you reach her you will need to light your torch and she will then run around a corner to your left, continue to follow her through the narrow passageway (there is only one way to go). Watch the floor once you reach a small opening as there is a pit on the left side and if you fall in you will die and have to restart from your last checkpoint. Just as you pass through this area, be prepared for bats to appear that will knock out your light source. Continue forward and you will find a larger "room" and directly in front of you is a waterfall.  Extinguish your torch and walk through the waterfall, then relight it (unless you have a lantern). Follow the passage way until you reach a fork in the road, and go left.  Continue along this passage way and you will come across another waterfall. Be careful when walking through the waterfall as there are pits on both sides, relight your torch as soon as you pass through the water. Hug the left wall and you will find a small downward hill portion that leads to a small pool of water and you will see Lisa running away again, continue to follow her. You will eventually catch up and at which point you can speak to her. She will tell you that "Everything that happens on this Island, happens for a reason." (like we've heard so many other times in the shows past). You can now jump down from a small cliff right behind where Lisa was. Walk until you find the corpse to the right next to the wall and take the object in her dead hand, it will turn out to be a compassLocke will now meet up with you on an above ledge and ask you to give him what you found, you refuse at first saying there's no time but in the end you throw it up after hearing the monster coming. He then helps you up and explains the engraving on the compass says "Via Domus" means "The Way Home" in Latin. He then carries out his end of the bargain and will give you the battery and the compass back.

"Forty-Two"[]

Sunvdx04

Elliott talks to Sun.

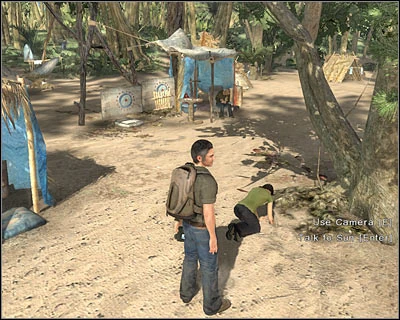
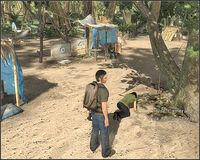
The episode opens with the Elliott sitting down at the beach and witnessing the explosion of the Swan station threw the jungle. Elliott's new goal is to find Sayid so he can give him the battery and get his laptop working. Talk to some of the Losties and you will find out that Sayid is at the hatch.

Before you enter the jungle and go to the Swan there is a little secret you may want to check out. You need to view six different objects (each with 4, 8, 15, 16, 23, or 42 on it) on the beach. Go to the very end of the beach and look under a little lean-to/shelter to find a suitcase. Examine it for the number 4. Next, go along the beach next to the ocean and find the seashells in the form of an 8 and examine it. Then, go to the other end of the beach and look on the side of where Sayid usually is working to find the number 15 on a piece of what was the plane. Examine it. Next, go to the tarp beside it and under it is a crate with the number 16 on it, examine it. Then, go to where Hurley is and examine the food cart beside him for the number 23. Finally, go to Charlie and examine the cards beside him for the number 42. After viewing these objects in sequence, Elliott can go to the Staff station. Once in the staff, take a photo of the Dharma Logo on the wall (this will give you another achievement) then return to the beach. (There are also some Apollo bars if you wish to look around, plus it's pretty cool to walk around these secret area's to get a better feel of what it's like to be in there)

Enter the jungle and use your compass to move from point to point toward the Swan. There are markers on the trees showing the path that Locke put up earlier in the game. You eventually meet up with Desmond in the jungle. After talking to him, go to the near-by marker and you have reached the area around the Swan.

SwanForty-Two

Sayid refuses to let Elliott into the Swan.

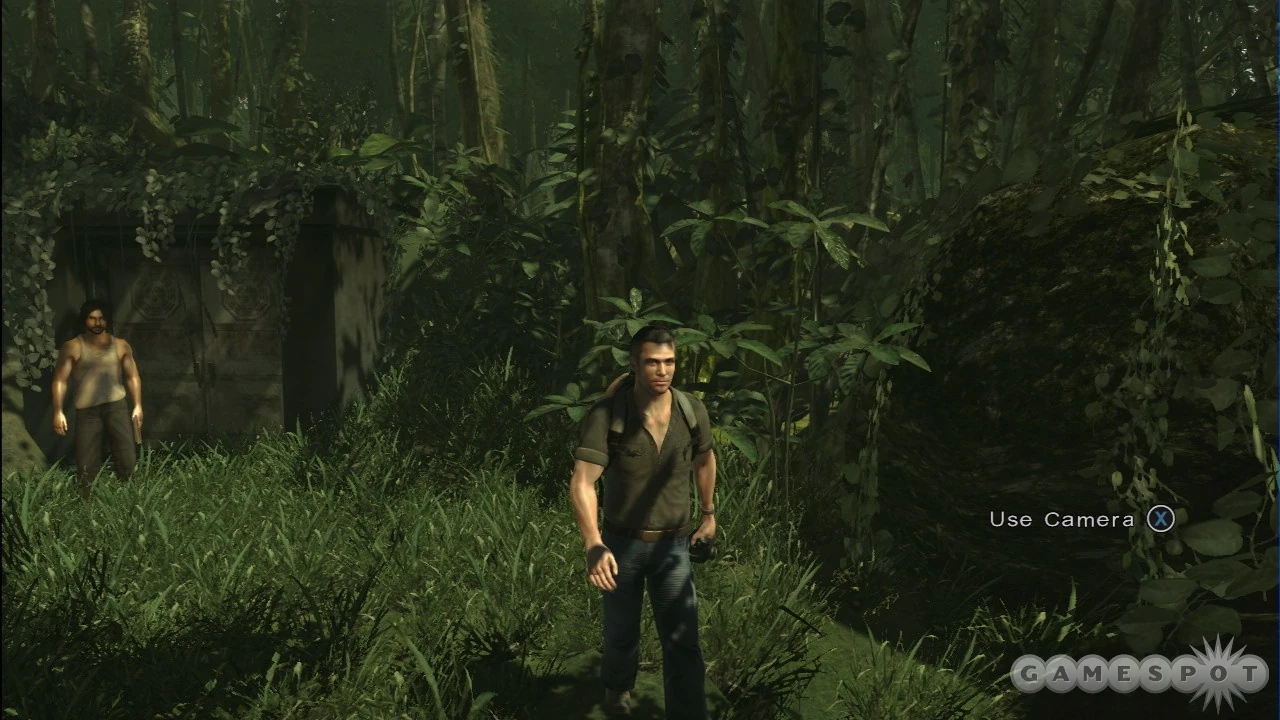
You can find Sayid standing near the main entrance to the Swan station. Walk up and talk to him and Elliott will give him the battery, however Sayid tells Elliott he will not allow him into the hatch until Elliot remembers his own name and can prove that he was on the plane. To learn his name, Elliott must return to the beach camp and talk to Hurley which triggers a flashback.

The flashback starts with you once again in Rico's Pawn Shop. You are standing by a glass counter and Rico is on the other side. You need to take a snap a shot of the folder on the glass counter with a picture of Savo on it. This will make Elliott remember that he was cheating Lisa out of her story. From here you can look at the three items or talk to Rico to end the walkaround. After talking to Rico you trade him picture's of his wife cheating on him in return you find out that Savo is staying in the hotel in room 42, Lisa comes in and is very angry with you for stealing her story and the scene ends.


Flashback items that can be examined;
The First is a recording;

Audio surveillance of Savo and an unidentified male. They're discussing a deal for delivery of sort of nerve agent.

The Second is a letter;

To the Board of Directors, Hanso Foundation, I'm pleased to announce the commencement of Phase 2 of the Chenchey Project. We will now begin to explore the human brain in ways never before imagined. The results will no doubt astound. I thank you for your continued support and enthusiasm. Warmest Regards, TM

The Third is folder;

Zoran Savo, Born: May 3, 1952. Chenchey, Bosria. Savo graduated from Whitney University in 1973. After completing his PhD in Neurological DNA, he moved to America to study prebiotic chemistry. In 1988 he joined Alvar Hanso's group at the Laboratoire de Biologie Neurologique in Paris where he studied genetics of the human brain. In 1992, Savo was appointed the first President of the Chenchey Institute of Research...


Elliott returns outside of the Swan and Sayid verifies his name is on the manifest. Sayid then grants him access to the Swan. When Elliott enters the Swan, the blast door drops behind him and Sayid asks him what he did. Elliott doesn't know what happened and Sayid tells him he needs to find a way to open the door. After entering the Swan, wait a couple seconds and some blast doors will open. Go inside and find the computer in a giant open room. You need to enter the number's into the computer to reset the countdown timer. (Once again the numbers are 4 8 15 16 23 42) The next thing that has to be done is to activate three different electrical panels in the Swan that control a set of switch's that open the main blast door.

Swan2

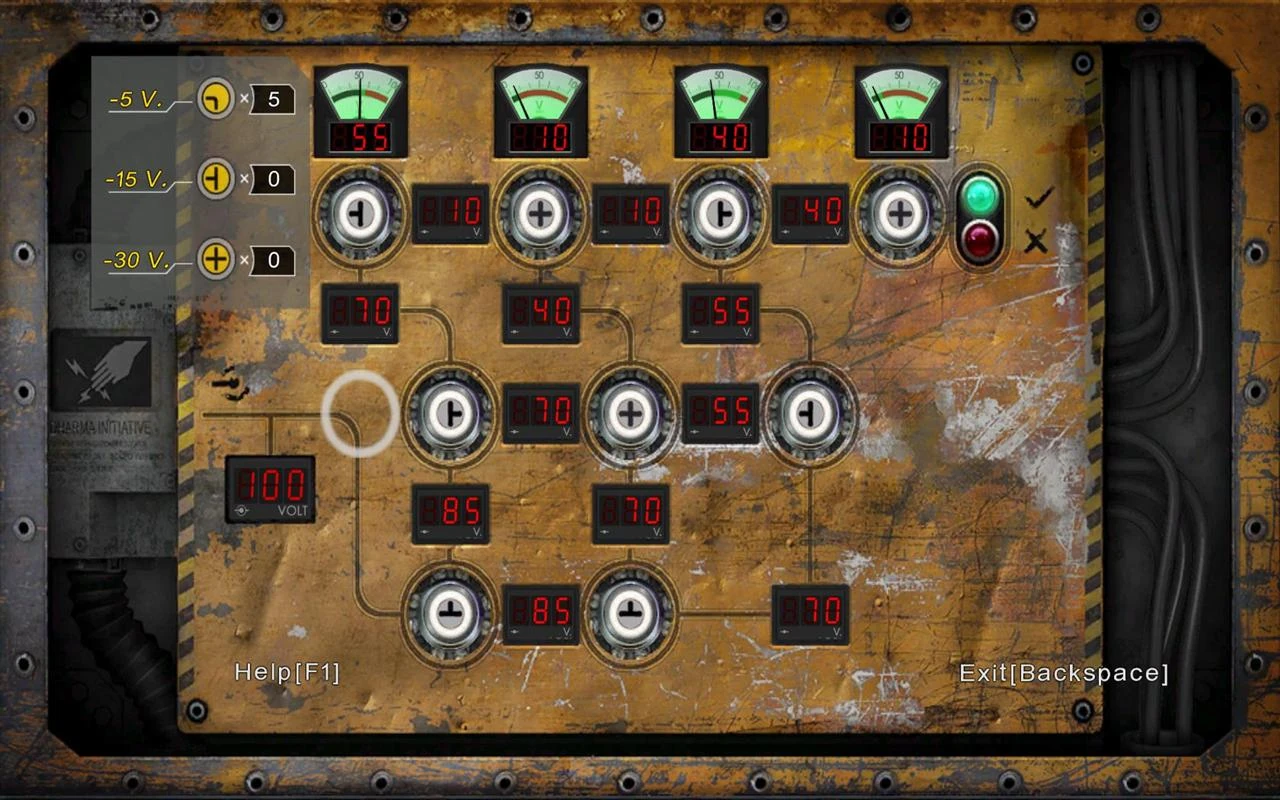
Swan electrical panel 1 (Swan entryway).

Swan1

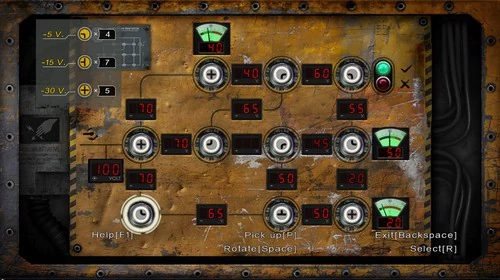
Swan electrical panel 2 (Sleeping area).

Swan3cb

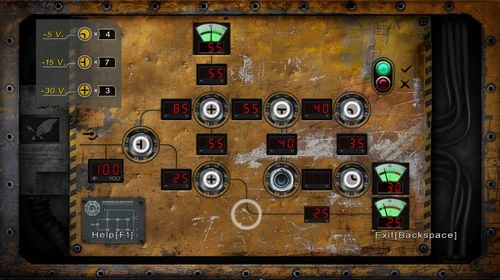
Swan electrical panel 3 (Next to laundry area).

Answer key for the Swan entryway;

  • Top row: 2-prong (Right and Down), 3-prong (No Right), 2-prong (Right and Down), 2-prong (Left and Up)
  • Middle row: 4-prong, 3-prong (No Down), 3-prong (No Down)
  • Bottom row: 4-prong, 2-prong (Left and Up)


Answer key for sleeping area;

  • Top row: 4-prong, 2-prong (Right and Down), 2-prong (Left and Down)
  • Middle row: 4-prong, 2-prong (Left and Up), 2-prong (Right and Down), 2-prong (Up and Right)
  • Bottom row: 2-prong (Up and Right), 3-prong (No Down), 4-prong


Answer key for laundry area;

  • Top row: 4-prong, 3-prong (No Up), 2-prong (Left and Down)
  • Middle row: 3-prong (No Right)
  • Bottom row: 4-prong, NONE, 2-prong (Up and Right)


When the three electrical panels are activated, the Swan enters lock down mode and all blast doors are lowered and the countdown timer activates with four minutes left. The Swan computer enters a new mode. The computer first asks the operator to "enter the way home". The answer is Via Domus. This reveals a menu for opening the three blast doors and setting two optional black light sources for the station.The lighting options controls for the Swan require passing psychology test.


Answers for psychology test 4/42;

First question: 3-7-15-31-(?)
The answer is 63
Second question: D-F-H-J-(?)
The answer is L


There are three blast doors that can be opened and closed. Blast door one controls access to the living area in the Swan from the computer room. Blast door two controls access to the corridor leading to the front entrance of the Swan. Blast door three blocks the outside entryway into the Swan.

There are two light sources that can be activated inside the Swan. These allow maps drawn on the walls to be seen. There are two maps in the Swan. One is on the blast door leading to the living area. It shows the other section of the Swan and how to enter it. Inside the living area on one of the walls is the blast door map from the show. If the second black light source is activated, a new set of writing on the blast door map is revealed including information on the Looking Glass, the Orchid, the Hydra, the Barracks and the Pala Ferry.

When the third blast door leading to the outside is raised, the survivors rush in and overpower Elliott. They take Elliott and lock him up in the armoury. Sayid reveals that Elliot's laptop contains information on various weapons including C4 and sarin gas.

"Hotel Persephone"[]

This episode begins with Elliott back in the locked armory where you ended the last episode. He awakens in a the dark and to advance you will need to light you lighter. Lisa appears to him once again and says "she can help you". She is talking about
ElliottAwakes

Elliott stuck in the dark.

Kate who is standing outside of the door to the armory. Just walk up to the door and talk to Kate and the flashback will begin after she mentions the Chenchey Institute.

This episodes flashback begins with you standing in the lobby of the hotel. Across the room you can see Lisa sitting at the computer doing some work on her laptop. You need to walk up and take a picture of the computer screen that she is looking at, but if you get to close to her she will close the laptop and you wont be able to snap the photo, if this happens just walk backwards a little bit and she will go back to working. Elliott then remembers meeting Lisa at the hotel and also seeing Savo arrive and going into the elevator. Lisa then reveals that Savo killed her sister and she offers to distract the bodyguard next to the elevator in order to get Elliott upstairs. This scene also reveals that the laptop actually belongs to Lisa.


Flashback items that can be examined;
The first is a recorder on a table across the hotel lobby

[Savo and his henchman discussing growing suspicions about Savo’s research and a breach in his Institute’s security around research on the sixth sense. The breach does not concern Savo.]

The second is a folder on the table next to Lisa

Los Angeles Sun Staff photographer Elliott Maslow, 36 A photo-journalist for the last 17 years, Maslow was nominated for several photo-journalism awards over the years but has since fallen out of favour. Maslow was suspended last year during a violent incident in Venice, Italy for questionable judgement while a fellow journalist’s wife was in danger.

The third is a letter also on the table next to Lisa

My dearest Lisa. If you are reading this, it means I’m dead. I can’t believe what’s happened -- The research being done at Savo’s institute has gone horribly wrong. Lives are in jeopardy. Patients are being injected with lethal chemicals. All in the pursuit of a mad dream… I’m so scared, and so sorry I won’t see your face again. Please don’t let it be for nothing. Tell the world who Savo really is. I love you. Joanne - 08/23/1999


You come back to the island and find that Elliott remembers that he was a journalist, he then uses that information to convince Kate to release him. Kate will let you out allowing the option to either search the Swan station some more or just leave the same way you have before. After escaping the Swan, you should walk across the shallow river and head under the tiny waterfall to find a path leading to a large steel like door. The door will be locked and will require dynamite to open it (it just helps to know where your about to have to come back to).

Lost-games-014

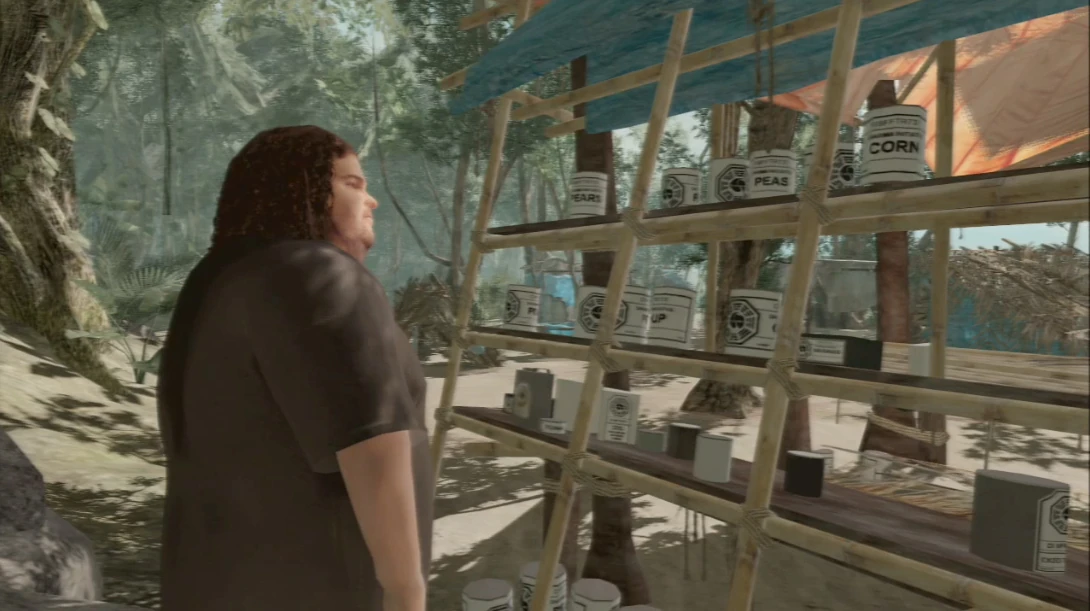
Hurley at the beach camp kitchen.

Once finished return the beach and find Hurley who is making a list of the food at the camp kitchen next to the tree line. He will tell you to head to the Black Rock to find the dynamite that you are after. If you have some goods for trading it's slightly advised to buy a gun for it will make your upcoming trip a little easier. To get to the Dark Territory just go into the jungle and jump your way back to the hatch area. Once you get there walk along the tree line directly to the left and you will find two black flags that will jump you straight to the Dark Territory.

ViadomusVW

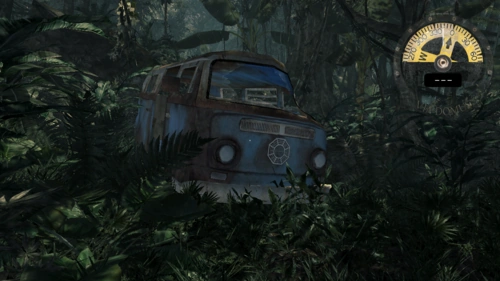
Elliott finds the DHARMA van in the Dark Territory.

In this new area you can find the same black flags and you will need to follow them just like you have before in order to get you to the Black Rock. As you makes your way from flag to flag, keep your eye out for the monster as it seems to come to you a lot more than usual in this area. You will have to hide in the Banyan trees between checkpoints and quite a bit too or there's no way you will make it. If you bought a gun from charlie use it to kill the Others that shoot at you from their tree forts, this will make your return journey easier with the dynamite because they wont be there. The DHARMA van can be found in the Dark Territory, however it will be tough to find but here is the best way I can get you there. Get all the way to the end of the path where you can check the black flag to enter the next area, don't, just follow that tree line to the left for a little bit and then you will see the van in some brush a little way's in the jungle from the tree line. It may take a while to find it your first time and you will most likely have to run back and forth to from the Banyan trees to hide from the monster.

When you arrive at the Black Rock, go inside and get the dynamite on the first "floor". It's not hard to find but this does give you a good chance to look around the ship and check some stuff out and angles that you didn't get to see in the show. Once you have the dynamite and are ready to head back, leave the ship threw the same hole in the wall you came in from. Make sure you do not run with the dynamite or will will blow up just like Dr. Arzt (you can run for a VERY short period of time). After you exit the ship, leave the area and return to the Dark Territory. The return journey is more difficult because you must dodge the monster who seems to attack constantly (but never run because of the dynamite). Getting through this requires being slow and methodical, and will take some time. Just make your way back to the hatch and hope you got good timing.

If you don't have a gun, you'll need to go and buy one from Charlie back at the

IncidentEntrance

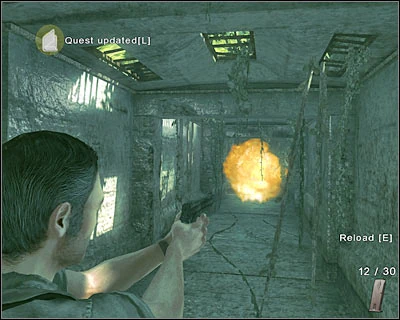
Elliott shoots the Incident Room entrance.

beach camp. One way or another first you need to go to the area mentioned before under the waterfall next to the Swan's side door. Place the dynamite on the door, move back as far as possible and then shoot the dynamite opening the door (or head to the beach to buy the gun and then do the previous). This will allow you to enter into an area of the Swan that we have never seen before in the show. It is the area behind the magnetic walls that the loud buzzing sound comes from. There is a large wrecked reactor of some sort in the center of the building almost completely tipped over on it's side. Along the outside wall is a computer, to access it you must pass another psychology test.


Answers for psychology test 12/42;

First Question: 26-17-20-11-14-5-(?)
Answer: 8
Second Question: Z-X-V-T-(?)
Answer: R
Third Question: GOD is to DOG as 394 is to?
Answer: 493


After passing the test you now have access to the computer which has three items in the menu. "Send a ping", "Check station status" and "Neutralize reactor". The only one you need to advance is "Neutralize reactor". When this is done, the large machine in the center of the room shuts down and Elliott's compass stops spinning. A message randomly appears on the computer stating: "We know what you did Elliott Maslow. And we will find you". This will end the 5th episode.

"Whatever It Takes"[]

RunawayMonster

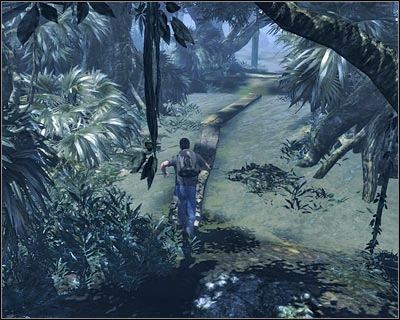
Elliott runs away from the Monster.

The episode starts with Elliott following his compass through the jungle looking for a way home. After a couple moments the monster comes crashing out of the jungle at Elliott, and now he has to run away from it as it chases him. This is a unique game sequence unlike anything you have played so far. With the monster chasing you; you'll need to jump over logs and rocks, slide under fallen trees, and carefully cross thin ledges that will either slow you down or kill you (if you fall off). Eventually you will come to the Sonar Fence at the Barracks and if you get far enough into an opening you will be interrupted by a cutscene. Juliet will appear on the other side of the fence and will begin talking to you. She accuses Elliott of killing Lisa which triggers a flashback.

You'll appear back at the Hotel Persephone and need to take a picture of Beady Eyes as he pulls out his gun and threatens Lisa, they both need to clearly be in the photograph. This triggers a memory of Lisa and Elliott each trying unsuccessfully to distract Beady Eyes from the elevator. Elliott tries again and tells Beady Eyes that Lisa is a Journalist investigating Savo. He takes Lisa away at gunpoint while Elliott slips into the elevator. Elliott realizes that he didn't kill Lisa.


Flashback items that can be examined;
The first is a Folder next to Lisa;

The Second is a Newspaper on the table;

The Third is a Guestbook Computer Screen ne the front door;

PearlEntrance

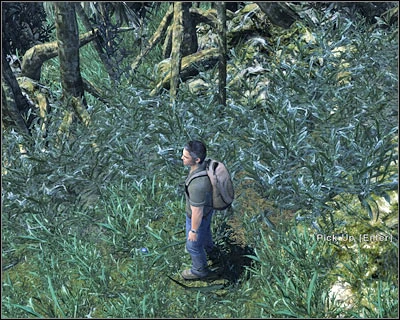
Elliott finds the Pearl capsule dump.

Elliott tells Juliet what he remembered and that he was not the one who killed Lisa. Juliet decides to let him through the fence allowing you to continue. If you need supplies you can trade with her for a light source and other useful items. There is also a field next to the cliff overlooking the lake. If you would like to explore around a little there is a capsule that can take you to the Pearl station and if your playing on the XBox 360 you can also get an achievement. To find the capsule walk into the large open field and follow the right tree line. While slowly walking look at the ground and you will find it relatively close to a large tree out of the line on the ground. After you are finished, go into the underground Flame entrance which is located near the left of the area if facing the direction you came through the sonar fence.

The lights are mostly out and you have to work your way around in the dark. There is an electrical panel in one of the rooms towards the end that will open a door leading up into the Flame station. Find it and activate the panel.


Answer key to the Flame fuse panel;

Flame eb

Flame Electrical Panel.
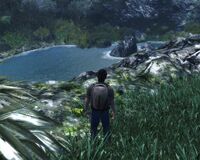
  • Top: 2-way (Down and Right), 2-way (Up and Right), 2-way (Down and Left)
  • Middle: 2-way (Down and Left), 2-way (Down and Right), 2-way (Down and Right)
  • Bottom: 2-way (Up and Right), 2-way (Up and Left), 3-way (Nothing Down)


Once through the door, you enter into the more above ground section of the flame station. There are many items in this room including beer, ammo, and an Apollo Bar. You can walk around and pick this stuff up or check out the next computer.
LagoonViaDomus

Elliott overlooks the Lake.

There are three options to pick from which are; "Pallet Drop" (24), "Audio Archives" (32), and "Mainland Communications" (38). The audio archive is a radio interview from 1999 with Elliott saying that he would give up anything for a story. If you press Mainland Communication, it will tell you that communication is down and asks if there was an attack by the hostiles, if you let the computer know that there was a take over caused by the hostiles the computer will explode and you will then be killed.

After exploring the room for a little while you will come across a door at the end of the building where Beady Eyes is holding Mikhail hostage and has him tied to a chair. This part can be tricky to do and may take a couple tries to nail it right. Open the door and let him talk for a sentence or so. If you try to aim at him too soon, he will shoot you down. If you let him talk, the game will give you plenty of time to aim and shoot. Once you have shot him, Mikhail claps and then three of the Others come into the room and Elliott is knocked out. This will end the episode.

"Worth A Thousand Words"[]

The final episode begins with Elliott waking up locked inside an empty aquatic tank in the underwater Hydra station. Lisa suddenly appears in the corner of the room and says "don't let it happen again, Elliott." Tom then appears on the other side of the glass in the observing room. Tom promises to let Elliott go if he tells him what he remembers about "Hanso and a girl named Lisa." In the conversation, Tom says that Juliet has given him a drug to help him remember, causing Elliott to have another flashback.

HydraSharkTank

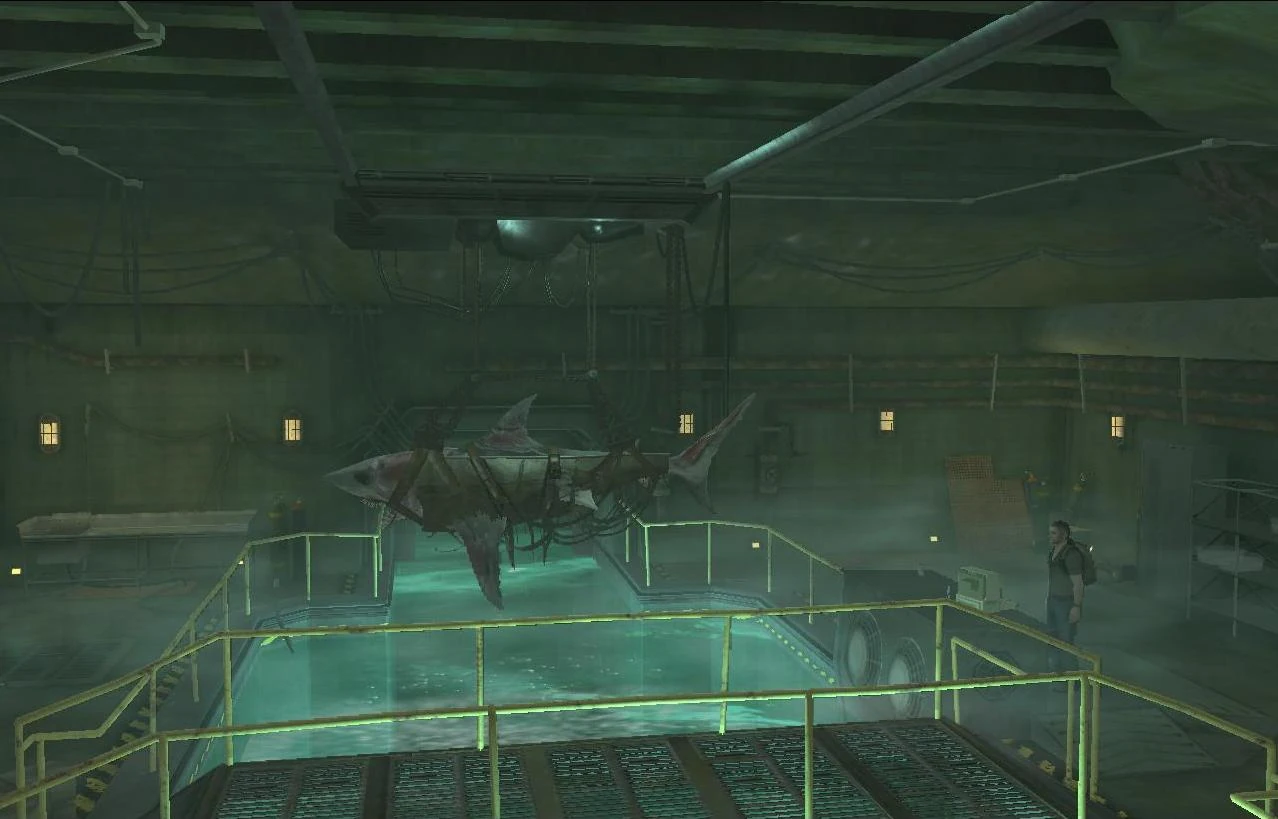
Elliott inside the staging tank.

The final flashback begins inside Savo's room (the Opal Suite of Hotel Persephone), Elliott is hiding inside a small, dark room outside of Savo's main office when Zoran Savo and Thomas Mittlewerk enter the room. To continue you need to take a photo of Mittlewerk giving Savo a Hanso Foundation briefcase. The photo needs to be taken directly when the briefcase is in both hands.

In the full flashback, Mittlewerk is revealed to be selling Savo Sarin gas. It turns out that Savo is using the gas for E.S.P. experiments. After the deal is completed, Savo orders Beady Eyes to bring in Lisa and he asks her about her partner. Lisa tells Savo nothing forcing him to order Beady Eye's to shoot her. After the gunfire Elliott falls to the floor in fright letting Savo and his coleages know he's there. Elliott runs out the room with Beady Eye's chasing him and now realizes that he betrayed Lisa for a photograph ending the flashback.

SharkVD

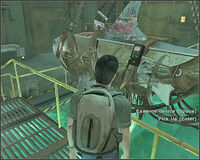
Elliott finds the shark.

Elliott tells Tom what he saw in the flashback and Tom keeps his word and lets him out of the cell. You are now free to roam around the underwater areas of the Hydra station. Your mission is to get out. All your possessions have been confiscated and you have to locate as many fuses as you can. You can find fuses just like any other place, they will be spread out around the room. The path ways are long and twisty and at one end of the station, there is an electrical panel. To access this panel you will need more fuse's than you currently have. You can continue searching around and while your at it go to the big open room with a huge pool in it. There are a couple of fuse's laying around but the two main things in this room is the shark in the pool and the computer next to it on the other side of the metal bridge. Before you can lift the shark out of the water you will need to pass another computer psychology before this happens.


Answers for psychology test 4/42;

Question 1: 2 - 4 - 8 - 10 - 20 - 22 - (?)
Answer is 44
Question 2: A - B - D - E - G - (?)
Answer is H
Question 3: Z - X - C - V - (?)
Answer is B


There are four items on the computer. A news report from 24.9.2004, an audio archive, a control for the lift platform and a posted note. Once you are finished looking at the computer make sure you use the shark lift. Go up to the lifted shark while standing on the metal bridge and take the fuse's of the machine connected to the side of it. This will give you the bonus fuse's needed to open the door that is next to the fuse panel. After making sure you have enough fuse's go to the last door in the hallway and there will be the electrical panel you are looking for. Complete the puzzle to get to the upcoming room.

Hydra map solution

The wiring to open the advisory room.

Answer key for Adivisory room fuse panel;

Top Row - 3-way (Nothing Connected to Right), 4-way, 4-way, 4-way
Middle Row - 3-way (Nothing Connected to Right), 2-way (Down and Right), 2-way (up and left)
Bottom Row - 3-way (Nothing Connected to Down), 2-way (Up and Left)


Elliot curiously walks into the room finding Ben and Juliet sitting at a long metal table staring at him. Ben tells him that he has a proposition for him and that they want him to lure Jack to the Black Rock where Tom will be waiting for them. Ben makes a promise to Elliott that he will give him a safe passage home in exchange for Jack, Ben also reveals that the Others are responsible for him finding the compass and have been manipulating him all along.
AdvisoryRoom

Elliott enters the Advisory Room.

Elliott returns to the beach camp. You can trade with Sawyer, but the only items he has are gun clips. Elliott goes to talk to Jack telling him that there is something he has to see at the Black Rock. Jacks asks what the deal is and Elliott tells him it is something he just has to see and Jack in return promises to meet Elliott at the Black Rock being the trusting fellow he is. The game doesn't give much guidance, but go into the jungle and jump to the Black Rock to get to the next part of the level.

When you get to the Black Rock you see Jack at the entry to the hold of the ship ready to enter with you. Right as you walk to the Black Rock Jack turns and gives Elliott a gun for protection.
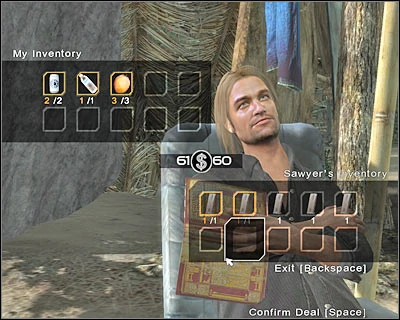
SawyerTentVdx07

Sawyer trades with Elliott.

Lead Jack up a couple flights of stairs to the deck of the ship where Tom is waiting for you guys to enter. It cuts to a scene with Jack becoming trapped and it also turns out that Kate (who has been following Jack once again, unknowingly) has been captured and taken as a hostage. Tom gives Elliott his compass back revealing his betrayal to Jack and Kate and tells him to leave.

Elliott has a change of heart based on the flashback of him betraying Lisa. To complete this next part you will need to use your gun. When looking at Jack and Kate there is a couple boxes to the right of the room, there is a small thing of dynamite on top of one of the crates. You will need to stand in between Kate and the dynamite and then shoot the TNT saving Jack and Kate's lives. Elliott gets knocked unconscious in the blast, but everyone lucky survives the explosion. Kate and Jack, unable to carry Elliott back to camp due to their wounds, drag him to safety in a field and argue about whether or not to leave him and then make their choice and Elliott passes out.

GunfightBlackRock

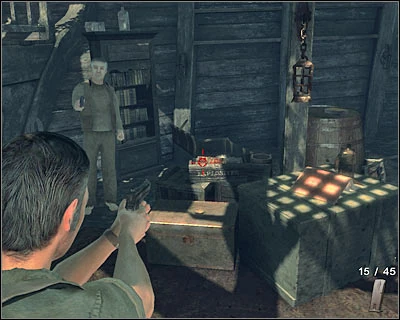
Elliott confronts the Others inside the Black Rock.

Elliott is woken up by Juliet on top of a cliff near the shore of the Island. Juliet says that Ben has ordered the Others to kill him for his retaliation and that the boat will be destroyed in two minutes. She also tells Elliott if he makes it to follow a compass bearing of 325 on the boat to get off the island safely. Juliet lets him know she was wrong about him and gives him back his camera.

You now have to go threw another running mission just like when you ran from the monster before you go to the Flame station. You have to run fast and screw up as least as possible to finish and as you do it the Other's shoot at you from there spots in the trees. You are in the clear and finished when you get to the beach and started to run on the rocks for a couple seconds. You can also see a boat controlled by the Other's headed to blow up Elliott's ride home. If you don't reach the boat in time, the Other's in the boat will throw a Molotov cocktail at the boat destroying it.

BoatExplodes

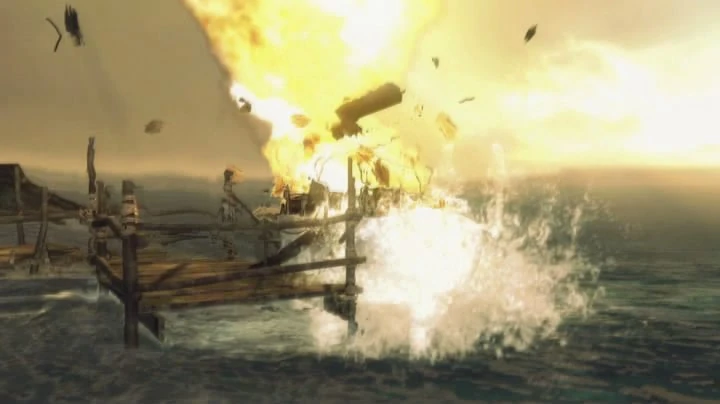
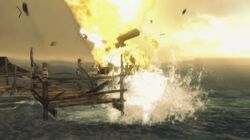
The Others destroys the sailboat if Elliott doesn't get there in time.

If you reach the end in the designated time you will see John Locke standing on the dock waiting for you as if he knew you were coming all along. You can talk to Locke for the last time during the game and then leave the island on the boat. Via Domus is the name of the boat just as the compass you have used the entire game. While sailing away, Elliott hears the sound associated with the day the Swan imploded. Elliott looks up in the sky to see the plane crash happening again and then wakes up on the beach only this time Lisa is now alive and a passenger. She yells out to Elliott as if she's trying to find him ending the game with just as much mystery as the day you first turned it on

Inventory list[]

Below is a list of the different items that can be found on the island during the game. The list is in alphabetical order.

Inventory List

Apollo Bar

"An Apollo bar. Seems this island has it's own candy bar. It's worth $50 for trading"
Beer "A can of Beer. Sawyer will like this. It's worth $25 for trading.
Book "The ODYSSEY by Homer. A famous Greek poem written between 800 and 600 BC. 500 pages
Camera "Digital camera. This is my camera. I was a photographer before the crash."
Coconut "A coconut. It's worth $2 for trading."
Compass "My compass. It has "Via Domus" engraved on it. That's Latin for "the way home". But it doesn't seem to work like a normal compass."
Crossed Fuse "A crossed fuse. This fuse connects four straight lines."
Curved Fuse "A curved fuse. This fuse connects two power lines running at different angles."
Food Box "A food box. It's worth $10 for trading."
Fuel "Jerry can of fuel. Useful for anything that needs fuel. It's worth $20 for trading."
Gun Clip "A gun clip. This has 15 extra bullets for the gun. I need to use these carefully. It's worth $30 for trading."
Hand Gun "A gun. Better safe than sorry on this island. You never know what's out there."
Laptop "My laptop. It looks like it busted in the crash. I need to fix it."
Laptop Battery "A battery. Sayid may be able to use this to charge my busted laptop."
Oil Lantern "Oil Lantern. This will be good in strong wind or rain."
Papaya "A papaya. It's worth $1 for trading."
Split Fuse "A split fuse. This connects two power lines to a single power line."
Torch "A torch. This will last longer if I keep it dry and stop it from going out. It's worth $10 for trading."
Water Bottle "A water bottle. This could be useful for trading. It's worth $5 for trading."

Notebook entries[]

Notebook Entries
Episode One:
Force Majeure
1.) Find help! "I'm wounded from the plane crash, my head's dizzy. I need to find other survivors and get help."

2.) Follow the dog. "I need to follow the Labrador Retriever. It's the only way to locate other survivors."
3.) See who needs help! "The crash site's in chaos! I need to check the survivors and help out somehow."
4.) Stop the fuel leak. "One of the plane's fuel tanks has been ruptured. I need to find an electrical panel to redirect the fuel to a second tank."
5.) Find anything of mine. "Jack suggested I try to find personal items around the crash site. Anything familiar could help restore my memories."

Episode Two:
A New Day
1.) Get past Jack. "Jack won't let me into the jungle to reach the cockpit section. I need to find a way to distract him."

2.) Find my camera. "Whoever is trying to kill me mentioned a mysterious photo. I need to find my camera before he attacks again."
3.) Reach the cockpit. "Kate suggested I search the cockpit wreckage in the jungle. Maybe my camera's there. I think I remember a stewardess saying she'd stow my camera."
4.) Follow the plane debris. "Chunks of plane debris are scattered all through the jungle. I bet these will lead me to the cockpit wreckage."
5.) Navigate the cave. "The cave is too dangerous to navigate without a light source. I need some kind of light to get through to the other side."

Episode Three:
Via Domus
1.) Get my laptop working. "I need to find a way to access the laptop. People in the camp are suspicious of me, so I need to find out who I am - fast. That laptop should have answers."

2.) Find Locke for a new battery. "I need to find a way to access the laptop. People in the camp are suspicious of me, so I need to find out who I am - fast. That laptop should have answers."
3.) Coerce Locke to help me. "If Locke won't help me, maybe I can add a little pressure. Everyone has a secret..."
4.) Meet Locke at the tree line. "When I'm ready, I'll meet Locke at the tree line. Then he says he'll take me to the batteries."
5.) Follow the tree markings. "Follow Locke's tree markings through the jungle. This should lead me to the batteries I need for my laptop."
6.) Explore the cave. "Locke is testing me. He wants to help me with my memories. What am I going to find in here...?"

Episode Four:
Forty-Two
1.) Give the battery to Sayid. "Sayid can modify these batteries to power my laptop. Once powered, my laptop should provide more information about who I really am."

2.) Follow your compass. "I need to follow the compass I found in the cave. Locke seems to think it is a "gift" from the island. VIA DOMUS is engraved on the compass. That's Latin for "the way home".
3.) Learn your name to enter the Hatch. "Sayid won't let me into the Hatch until I prove my name is on the passenger manifest. I should head back to the beach and ask if anyone can remember my name or anything else about me."
4.) Enter the numbers. "Sayid is trusting me to enter the numbers on the Hatch computer: 4, 8, 15, 16, 23, 42."
5.) Find a way to open the door. "Blast doors have sealed me inside the Hatch. I need to find a way to override the system and open the doors."
6.) Find a way behind the concrete wall. "My compass is pointing to the magnetic anomaly behind the concrete wall. I need to find a way to access the magnetic chamber."
7.) Find hidden door. "According to the blast door map, there is a hidden door nearby that leads to the magnetic room."

Episode Five:
Hotel Persephone
1.) Find a way out of the cell. "Jack and Sayid have locked me up, thinking that I'm dangerous and not to be trusted. I need to find a way out of the cell and resume my quest."

2.) Find a way to open the sealed door. "The steel door to the magnetic room has been locked shut. I need to force it open."
3.) Get dynamite at the Black Rock. "I need dynamite to blow open the locked door. Hurley said to head for the hatch and follow the black flags to the Black Rock. I'll find dynamite there."
4.) Neutralize the magnetic interference. "I need to briefly neutralize the magnetic interference to allow my compass to find its true bearing."

Episode Six:
Whatever It Takes
1.) Follow the compass. "With the magnetic interference neutralized, my compass is giving me a new heading. I need to follow it and find "the way home".

2.) Follow the underground passage. "The underground passage is the only safe path through this area. I need to use caution. The Others are everywhere."
3.) Reach an exit. "I must access the main floor if I ever want to get out of here. If there is really a way off this island, I must be getting close."

Episode Seven:
Worth A Thousand Words
1.) Find a way out. "I need to find a way out of here and locate Ben, the leader of the Others. He seemed to have a special interest in me."

2.) Bring Jack to the Black Rock. "Ben has asked me to lure Jack to the Black Rock. If I do this, Ben has promised me a way off the island."
3.) Save Kate and Jack. "Both Kate and Jack are about to be taken by the Others. It's up to me to save them."

Bonus artwork[]

Below is a list of the bonus artwork that is included in Via Domus. When you take specific pictures you can go to the Extras section in the main menu and view these various conceptual art pictures.

  1. Dharma Ride - The cave where you find the compass
  2. Staff - Room in the Hydra station where you raise the shark out of the tank
  3. Beam of light - A painting of the hatch
  4. Kelvin's jumpsuit - The cliffs where you run from Smokey the monster
  5. Medical cabinet with vaccines - Rico's Pawn shop
  6. Swan mural - A tent in the foreground
  7. Blast door map - Hydra room with the animal cages and glassed off area
  8. Hidden entrance map - Some jungle trees
  9. Cable map in Flame - The Incident Room from the Hatch
  10. 4 8 15 16 23 42 - The beach with an unknown person in sight

Tips, hints and credits[]

This is a small list of different tips and hints that will prove useful while playing the game for any of the game systems. Some of these tips have come from people who have played the game, while other are from a broad span of different internet sites.

  • In the achievements section there is certain one's acquirable by taking pictures. If you get these they will give you conceptual art in the main menu. They are just little extras but always fun to look at. This works with the computer version of the game as well as XBox 360 (PlayStation 3 Unknown).
  • After solving the fuse panel puzzles, make sure that you return to the just finished panel and take any fuses back that you can. To do this simply move the cursor to the desired fuse and press the button that the screen tells you to. This will prove helpful in the long run so you don't have to spend as much time running around looking in every nook and cranny for spare fuses.
  • A very helpful strategy to avoid gunfire while moving through the jungle is to move in a zig-zag formation instead of just running in a straight line.
  • When walking around the many different locations on the game you can find different types of loot you can use for trading such as fruit and bottles of water, pick up as many of these up as possible.
  • Take your time and enjoy the game. While playing you should really consider treating this as an experience that takes you straight to the island you have dreamed about since that fateful day in 2004. Look around and take in everything the game has to offer. Remember how it feels when you watch an episode for the first time? Treat this just like that and get the most out of this interactive Lost world.
  • Talk to your peers as much as possible. You and me both know that talking to some of these people might seem pointless but it does carry on the game and give you your dollars worth. Plus it makes for a great one time only experience that will lack enthusiasm the second time around if attempting then.
  • Your first time playing the game make sure you just continue your last chapter and not enter into an individual episode. If you do so your inventory will be wiped clean and even making you start an entire episode over making your last checkpoint that you worked so hard to get to meaningless.
  • Be careful of death. When you do die in the game, you have to start back from your last save point and this can be frustrating (especially having to sit through unskippable cinematics) so stay on watch at all times.
  • It isn't always necessary to buy a gun at the first opportunity. You don't use it a lot when you are first able to buy it so sometimes it is best if you just wait until later in the game when you know you will need it. Save your money for light sources and other useful items.
  • Don't even try to kill the monster with your hand gun, no matter how much you try you will not harm it (if you even get the chance to pull your gun out at the right time).


Advertisement